
November 2001: Hood Support Frame
As anyone who has a Tiger Cat with the weather gear will know, if you leave the car in a rain storm after a short while the roof begins to sag and creates what I call "Lake Tiger". This has the effect of both reducing headroom inside the car and soaking you as you get out.
The main reason for this is that the roof panel is a single sheet of material over a metre long with no support in the middle. After enduring a few too many soakings I decided to do something about this.
The solution turned out to be remarkably simple and cheap and is described below, basically it consists of a second removable hood frame which acts as a support, keeping the roof under tension all the time. The result is no more lake and increased headroom due to the prevention of sagging.
Also after showing the design to Jim Dudley (Tiger Racing MD) he was impressed enough to ask for the instructions below to add to the build manual for the Cat. So the section below is more of a how to rather than a explanation.
Items needed
1 x 3m length of 20mm plastic conduit
2 x 90 degree angles to fit conduit
2 x 4" lengths of doweling to fit in conduit
2 pairs of pin hinges (similar to side screen supports)
2 lengths of seat belt webbing approx 1000mm long
2 lengths 2" wide Velcro approx 200mm long
Instructions
The first job is to make up the two straps to hold the bar in place. This will probably require an industrial grade sewing machine. If you do not have access to a suitable machine a local trimmer should be able to make these up. If not AF Smith & Sons in Peterborough (01733 340100) made the set shown in the photographs. The diagram below details how they are made.

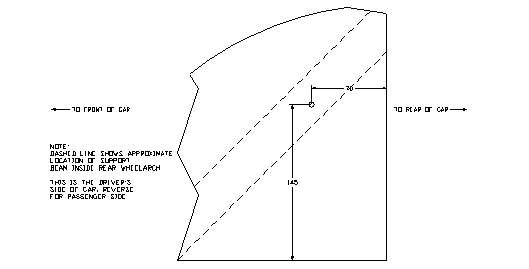
Drill and tap a suitable hole though the side trim panel as in the drawing below. Ensure the hole passes into the diagonal support frame inside the rear wing. Once the hole is drilled and tapped screw the socket end of the hinge into the hole made and repeat for the other side.
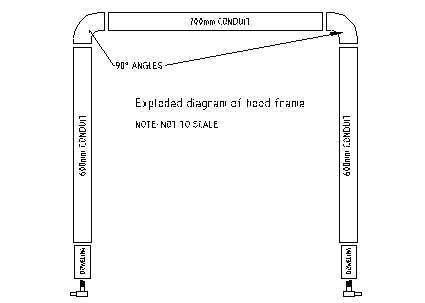
From the plastic conduit cut two lengths 620 mm long and one length 720 mm long. These sizes are around 20mm oversize to allow for variation when fitting.
With the two pieces of doweling drill a suitable hole in the end of each one and secure the other part of the pin hinge into it. Note a small rawlplug might be needed to get a good fit for the hinge. Next insert one piece of doweling into each of the short lengths of conduit ensuring that the doweling cannot move. Join the pieces together into a U frame as in the diagram below and check that it fits into the pins mounted on the car, adjust as needed.
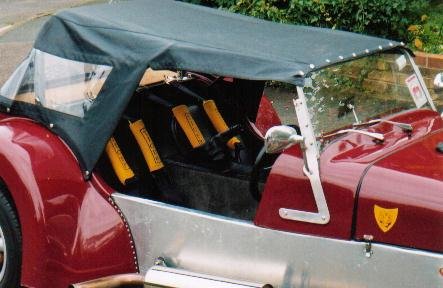
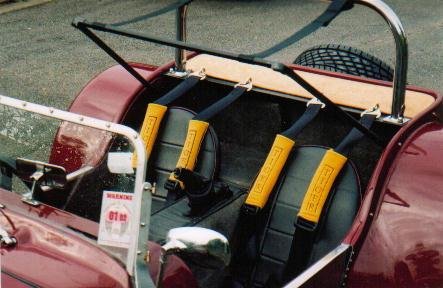
When the straps are attached to the support bar and roll bar the hood frame should sit firmly in place. When fitting the hood it should form a tight fit over the bars and not suffer from sagging in the middle. The pictures show the check straps from inside and also the frame and hood fitted to the car.
|

|
|